How to Plant Bare-Root Blackberries the Day They Arrive

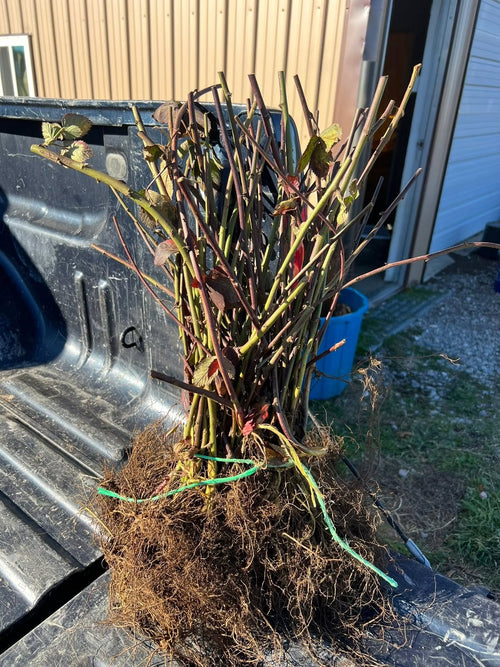
Your blackberries just landed, so let's get going. Bring the box into the shade, grab a bucket and a shovel, and I'll talk you through it. Bare-root blackberries don't look like much coming out of the packing, and that's normal, because they're dormant and all they want today is to not dry out.
When the box arrives

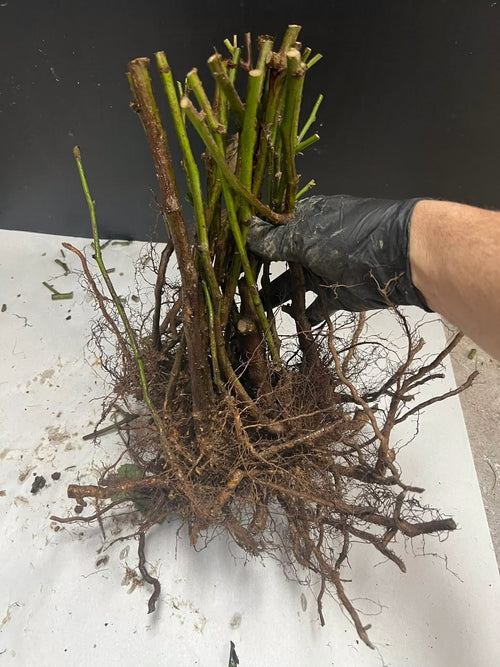
1. Open the box in the shade and check the roots. Don't set them out in the sun or wind while you think things over. They should feel damp, or at least flexible. If they're a little dry, soak them in water for several hours before planting. If they're bone dry, the University of Arkansas tells home growers to reject the shipment, and I agree. We guarantee plants arrive alive, so get in touch with us before you plant anything that looks wrong.
2. Fill the bucket and put the roots in it. Hold the plants there while you work so the roots never sit out in the air. A hole takes longer to dig than you'd think, and wind will dry fine roots faster than you'd believe. On healthy plants, 20-30 minutes in the water before planting is plenty. Don't treat the bucket as storage, though, because if planting slips past today you should take them out and keep them damp in their packing somewhere cool, or heel them in.
Pick and prepare the spot

3. Walk out to the spot and make sure it's the right one. Blackberries want full sun, deep soil and good drainage, so stay away from anywhere water stands for long periods. Plants in part shade may give you less fruit, so I'd pick the sunniest ground you've got and give up a little lawn for it. If the ground stays soggy, build a raised bed 6-10 inches high and 2-3 feet wide. Soil pH should run about 5.5-6.5.
4. Check what grew there before. Don't plant where potatoes, tomatoes, peppers, eggplant or strawberries grew in the past two or three years, since verticillium wilt can hang on in the soil and get in through the roots. If your only sunny spot is the old tomato patch, keep looking anyway, because walking the row to a new spot today beats losing it in year three.
5. Clear the grass. A blackberry row has a long life ahead of it, and in a perfect world you'd start killing perennial weeds and sod a year before planting. You don't have a year, because the plants are in a bucket, so take the sod off a band about 18 inches wide and fork the soil loose as deep as you reasonably can. Kill the rest of the grass later. Bermuda creeping back into the row is the fight I'd take most seriously, and you don't want it in the row middles either. Fescue or native grasses are fine there. If you're planting in old garden ground, you're in better shape, because you can work it like a seedbed, mellow to a depth of 5 to 8 inches.
6. Mark your spacing before you dig. This depends on the variety:
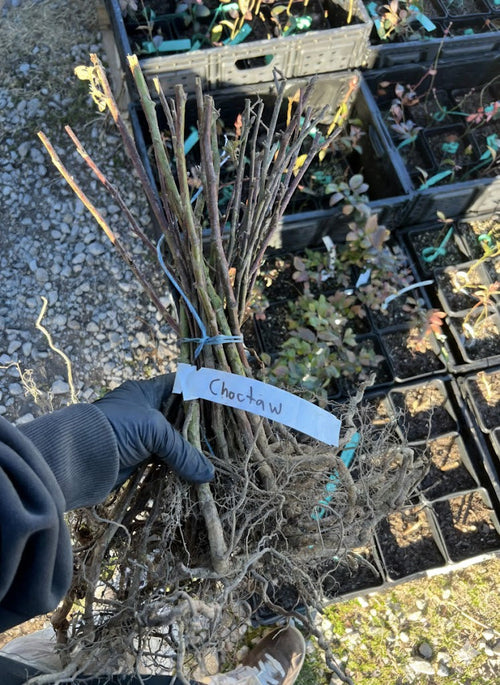
- Erect types like Ouachita, Osage and Choctaw go 2-3 feet apart in the row, which will fill in to a solid hedge.
- Semi-erect types like Triple Crown need a lot more room, about 8 feet apart.
- Trailing types go 4-6 feet apart on a trellis.
- Rows go 4-8 feet apart, depending on what you need to walk or mow through.
Use the tape measure.
Planting

7. Dig a hole wide enough to spread the roots out flat. Width matters more than depth here, and a trench works well if you're planting a whole row. Clip any broken or mangled root back to healthy tissue, but if one is just too long to fit, make the hole bigger before you start cutting.
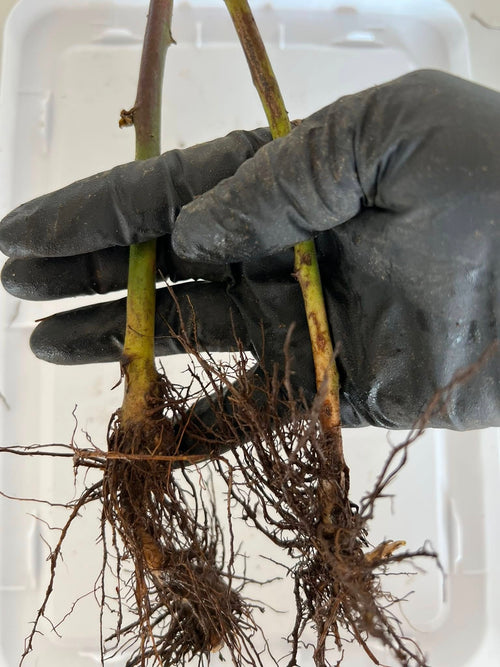
8. Set the depth. Look for the nursery line, a dark mark on the upper root and lower stem, and plant at that same depth or up to about an inch deeper, so the line sits right at the surface or a hair below, with every root covered by at least 1 inch of soil. What you don't want is the crown buried deep, or roots poking out of the ground.
9. Backfill with the soil you dug and firm it with your hands. Push the soil in around the roots until no air pockets are left, and don't pile fertilizer in the hole. Compost or slow-release fertilizer has to go in a few weeks ahead of planting, which is no help to you today, so skip it and feed later.
10. Water it in. Give each plant 1-2 quarts to settle the soil around the roots, then go by feel. Pour slowly, let it soak, and top off any spot that sinks.
11. Cut the cane back to about 6 inches. Your new canes will come from the crown and roots, so that old stem has done its job. Some guides go further and trim to ground level to force new growth. I like leaving the 6 inches, since it shows you where each plant is when you're out with a hoe. Pull the trimmings out of the row.
The first season

12. Decide on mulch. The extension services really do split on this one. The University of Kentucky says mulch right after planting to hold moisture and hold back weeds. Kansas State says hoe through the early part of the first summer and hold off on mulch until the plants are established, since mulching too early can interfere with root growth. In a wet spot on heavy clay, wait. On sandy ground or a dry slope, mulch now. Either way, keep it off the crown.
13. Keep the soil moist and wait. This is the hard part. New canes (green ones) can take four to six weeks to come out of the ground, and that stub might look dead the whole time, but don't dig it up to check. Figure on the equivalent of 1 inch of rain a week, enough to soak the soil about 10 inches down. Irrigation is a must in the first season, so if the sky doesn't deliver, you do.
14. Feed once the plants are growing. If nothing went into the soil beforehand, wait about a month after planting, then give each plant 1 ounce (1 tablespoon) of something like 12-12-12, with a second dose six weeks later. For a whole row with no soil test, the University of Arkansas's first-year number is 5 pounds of a complete fertilizer like 10-20-10 per 100 feet of row, once the plants are growing. Keep it a few inches out from the plant.
15. Leave them alone the first summer. Don't trim new brambles at all that year, and don't expect fruit on a regular summer-bearing variety either, because the canes growing now are the ones that'll flower and fruit next year. Keep the ground free of weeds and grass until late summer, water through the dry spells, and tie up any canes that want to flop. It's worth the trouble, since a well-kept planting stays productive for 8 to 10 years or longer.
A word on timing
In case you're reading this before the box shows up: plant anytime in spring before the soil warms, because planting later can reduce growth. Safe dates start in February in Arizona and run to late March through early April in Kentucky. Here in Tahlequah, my pick is the early end of that spread, as soon as the ground can be worked, but if it's frozen solid or soaking wet on the day they arrive, don't force it, because working wet soil leaves you with clods. Keep the roots damp and cool, heel the plants in, and plant when you can.
Sources
- University of Arkansas Cooperative Extension, FSA-6105
- University of Kentucky Extension, NEP-243
- Kansas State University Research and Extension, MF-720
- University of Arizona Cooperative Extension, Brambles
- Purdue University, temporary shelter for bare-root plants
- University of Tennessee Extension, SP284-G